Tips After Your Hardwood Flooring Installation Process

Now that your hardwood flooring has been installed, there are a few tips to keep in mind to keep them beautiful for years to come.

If you haven’t already read:

Tips Before Your Hardwood Flooring Installation Process

Tips During Your Hardwood Flooring Installation Process

Start there. Then read on to discover a few important details you can start putting into action today.
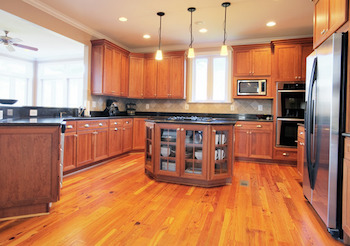
tips after your hardwood flooring installation process Tips After Your Hardwood Flooring Installation ProcessAfter installation:

Nothing can damage hardwoods quicker than a deep, set in scratch. Before you place any furniture down, place a felt pad underneath for protection. You can find felt pads in any size and color; cut them to size to ensure a perfect fit.

For even more protection against scratches, dirt, and moisture, consider placing area rugs throughout your home. The key is using them where traffic is at its highest. You can use them in entryways, hallways, or in rooms where people spend a lot of time. Area rugs are perfect under dining room tables or along couches and chairs where feet are more likely to shuffle against the floor.

Clean and maintain your floors on a regular basis. In many ways hardwoods are easier to keep clean than other choices. A simple sweep can remove the dust and other small particles that have impact on your floors over time. Make sure you don’t use too much water, or allow water to puddle as this can ruin them quickly. Also be careful about using floor cleaners and waxes; check with the manufacturer or contractor for ideas on the perfect products to use.

Dents are also a common occurrence in hardwoods. The easiest way to avoid dents is to trim pet nails on a regular basis, and take off high heels when walking and standing on the floor. Dents can be a very costly thing to fix, so its important to take precautionary measures from the beginning.

Make sure the temperature of your home is a constant. Extreme changes in temperature can cause hardwood to expand or buckle, contract or create gaps between the planks. Because hardwoods are a natural product, it will react to new and changing conditions, including humidity changes. The more of a constant you can make your home, the more settled your hardwood flooring will be.

PRO!coupon savings Tips After Your Hardwood Flooring Installation Process

For all of your Denver Hardwood Flooring needs visit our site today.
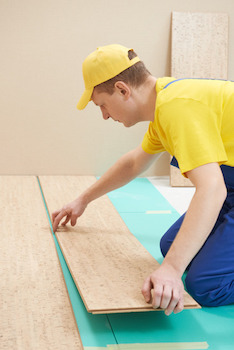
Tips During Your Hardwood Flooring Installation Process

Nothing can be as exciting or change a room faster than installing new flooring. And when you’ve made the decision to install hardwood flooring, you know you’ll be investing in a look and feel that will not only look good for years to come, it will also add value to your home overall.

Start by reading our Tips Before Your Hardwood Flooring Installation Process. Then continue here and discover some important facts to take into consideration as the process begins.

During installation:tips during your hardwood flooring installation process Tips During Your Hardwood Flooring Installation Process

Make sure your installer is aware of where hardwoods will be laid in your home, and what other flooring it will ultimately bump up against. Different types of transitions will be used depending on your other flooring. Its also important to use the right transition for each situation. For example, a T-molding is used when transitioning from one flooring area to another flooring area at the same height level. A reducer transition is required if your hardwood floors are slightly higher or lower than another hard surface, such as vinyl or tile. This will ensure anyone in your home can easily move between flooring without risk of tripping or injury.

Because hardwood flooring will expand and contract during its life, its important to leave space for this natural occurrence. Expansion gaps must be used when your floors meet the walls to ensure space for normal expansion and contracting. This includes walls, door stops, transitions, poles, or any other area where there is a distinct transition.

With real hardwood flooring, its important to mix up the planks from different boxes. Individual boxes of hardwood usually will have planks with a similar look and feel. By mixing up the boxes and applying the planks in different areas of your room, you will avoid having slight variations as the wood transitions from one side to another. Mixing the planks is an important part of installation for hardwoods, less for laminate flooring. Laminate flooring has a more uniform look, so the variations won’t be as noticeable.

Determine the direction of the planks. For hardwood planks, they must be installed perpendicular to the joints supporting your subflooring underneath. This will make your floors stronger and last longer over time. For laminate flooring, you can choose the direction the planks will be installed. For example, running your laminate flooring long ways across the project area will be easier to install, give you long, clean lines, and provide you with fewer seams to contend with over time. Or try following the flow of light. If sunlight streams through a panel of windows, allow the grain of the wood to flow along those lines. It will help you create a warm look and feel to your room.

Be sure to continue with Tips After Your Hardwood Flooring Installation Process

PRO!coupon savings Tips During Your Hardwood Flooring Installation Process

For all of your Denver Hardwood Flooring needs visit our site today.

Tips Before Your Hardwood Flooring Installation Process

Hardwood flooring is one of the most popular choices on the market today. And its not just for your main living space. You can use hardwood to create a warm, inviting look in any room in your home.

But hardwood flooring does need special attention. If you follow these few steps, you’ll enjoy your floors for years to come.

Before you install:tips before your hardwood flooring installation process Tips Before Your Hardwood Flooring Installation Process

Finding the right installer just might be the most important step in your installation process. If wood is installed correctly, it will provide you with years of enjoyment trouble-free. Make sure you talk with several contractors as you begin the process. The more educated you become about hardwoods, the easier it will be to choose the right flooring – and the right installer – for you.

Once you’ve made your final selection, the wood or laminate flooring you choose should be acclimated to the temperature and conditions of your home. Hardwood or laminate flooring will expand and contract over time due to the conditions of your home. In order to reduce this movement to a minimum, bringing the wood into your home and giving it time to breathe will keep the movement to a minimum after installation.

Make sure your home is in livable condition, and that the air conditioning or heating system has been operating at least two weeks before installation. Wood products must be acclimated in livable temperatures, which is why its important for your home to be at a steady temperature in order to provide you with the best results.

Make sure the area is fully prepped before installation. This can include removing furniture, removing old carpeting, fixing any squeaks or loose boards in the underlayment, fixing leaks that could damage the new floor, or leveling out the subfloor.

Be sure to continue with:

Tips During Your Hardwood Flooring Installation Process

Tips After Your Hardwood Flooring Installation Process

PRO!coupon savings Tips Before Your Hardwood Flooring Installation Process

For all of your Denver Hardwood Flooring needs visit our site today.